How to Set Up Basic and Advanced Email Templates
Print
Modified on: Tue, 22 Nov, 2022 at 12:57 AM
CusRev provides ready-made, customizable email templates that allow you to quickly create personalized emails for your customers without any coding knowledge. There are two types of template available, namely Basic and Advanced templates, and which one to use will depend on your needs.
Basic Email Templates
Basic Email Templates are available to anyone who installs our plugin and give you the basic tools that you need to design simple emails on the fly. These tools allow you to change the most important aspects of an email like the body and background color. If you don’t want to spend too much time customizing every part of your email to match your brand, this option might be what you need.
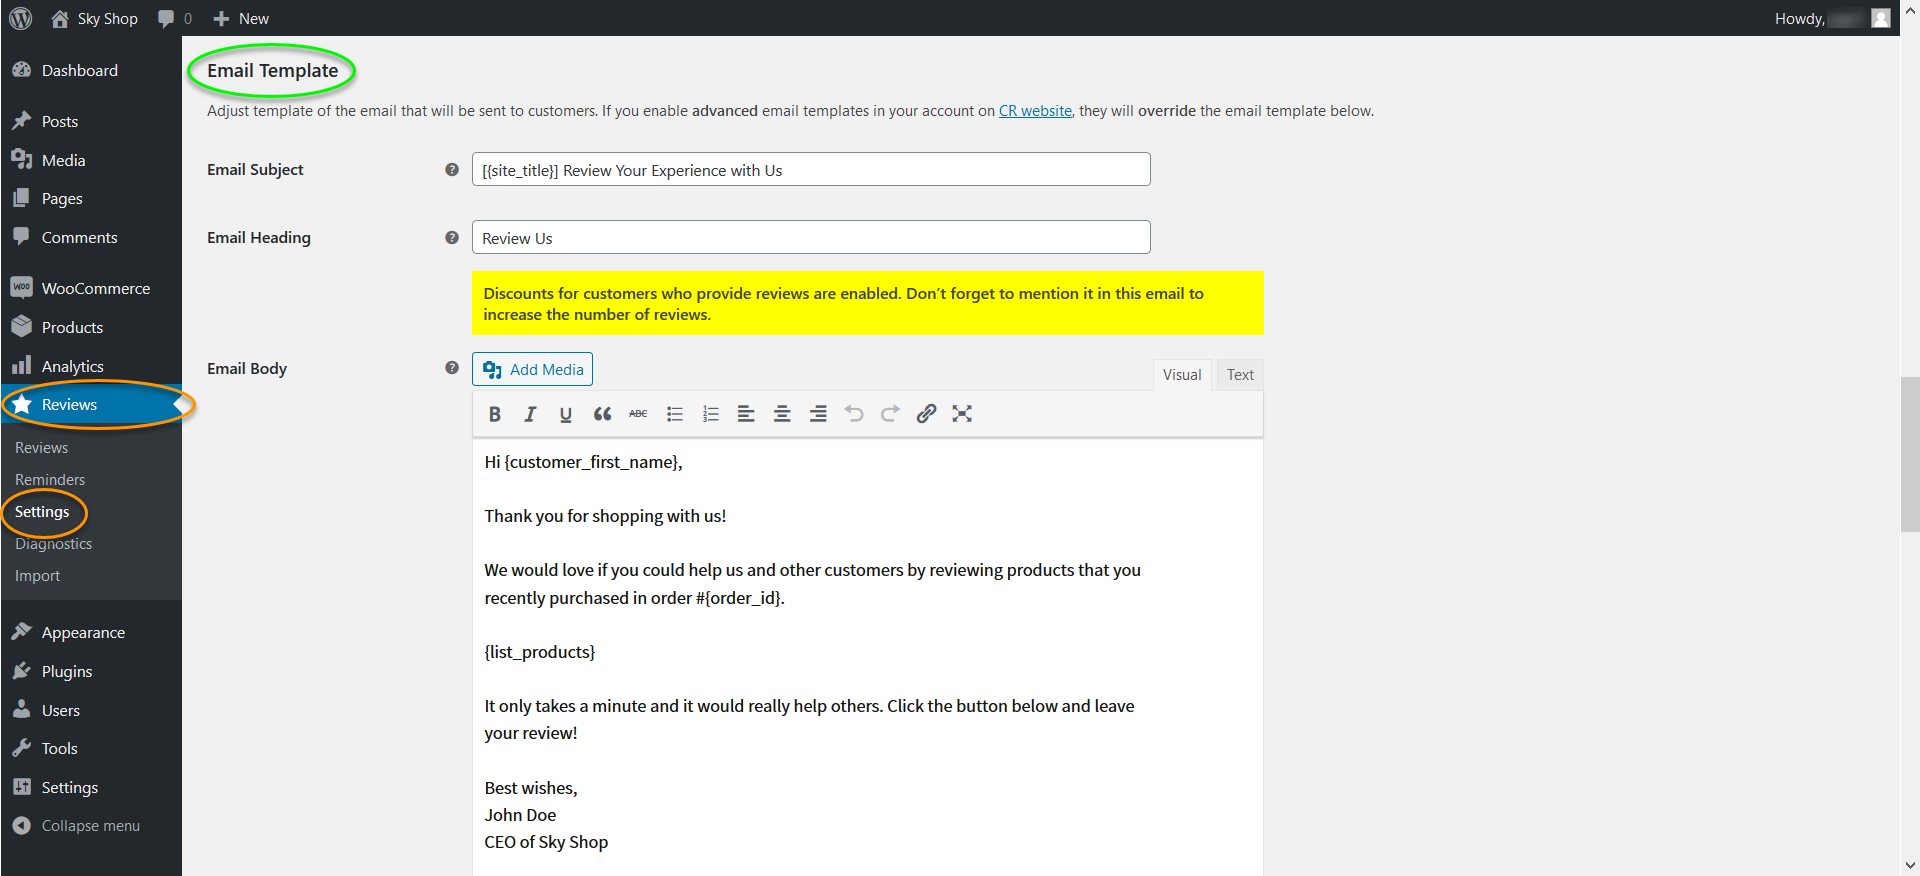
This is where you can customize the different sections of your email: the subject, the heading, and the body. You can also use variables to customize the email so that it’s personalized to the particular customer that you're sending it to. This is crucial as it prevents your email from sounding too robotic. There are 6 different variables that you can use:
site_title: The title of your WordPress website.
customer_first_name: The first name of the customer who purchased from your store.
customer_name: The full name of the customer who purchased from your store.
order_id: The order number for the purchase.
order_date: The date that the order was made.
list_products: A name and price list of the products purchased.
Note that you need to enclose the variables between curly brackets (e.g. {site_title}) for them to work properly. Before sending the email, these variables will change to the values that they represent. For instance, if your customer’s name is Jane Doe, putting "Hi {customer_first_name}," in the email body will appear as "Hi Jane," when the email is sent.
Colors
You can customize the background color of your email heading and the body of your email using the Email Color 1 and Email Color 2 options respectively.

Testing
Finally, after you’ve configured the email to your needs, save your changes by scrolling to the bottom of the page and clicking the Save Changes button. One important function of our plugin is the option to send a test email to your email address so that you can see exactly how your customized email will look like to your customer. To do this, scroll to the bottom of the page after saving your changes, type your email in the Send Test input box and click Send Test.

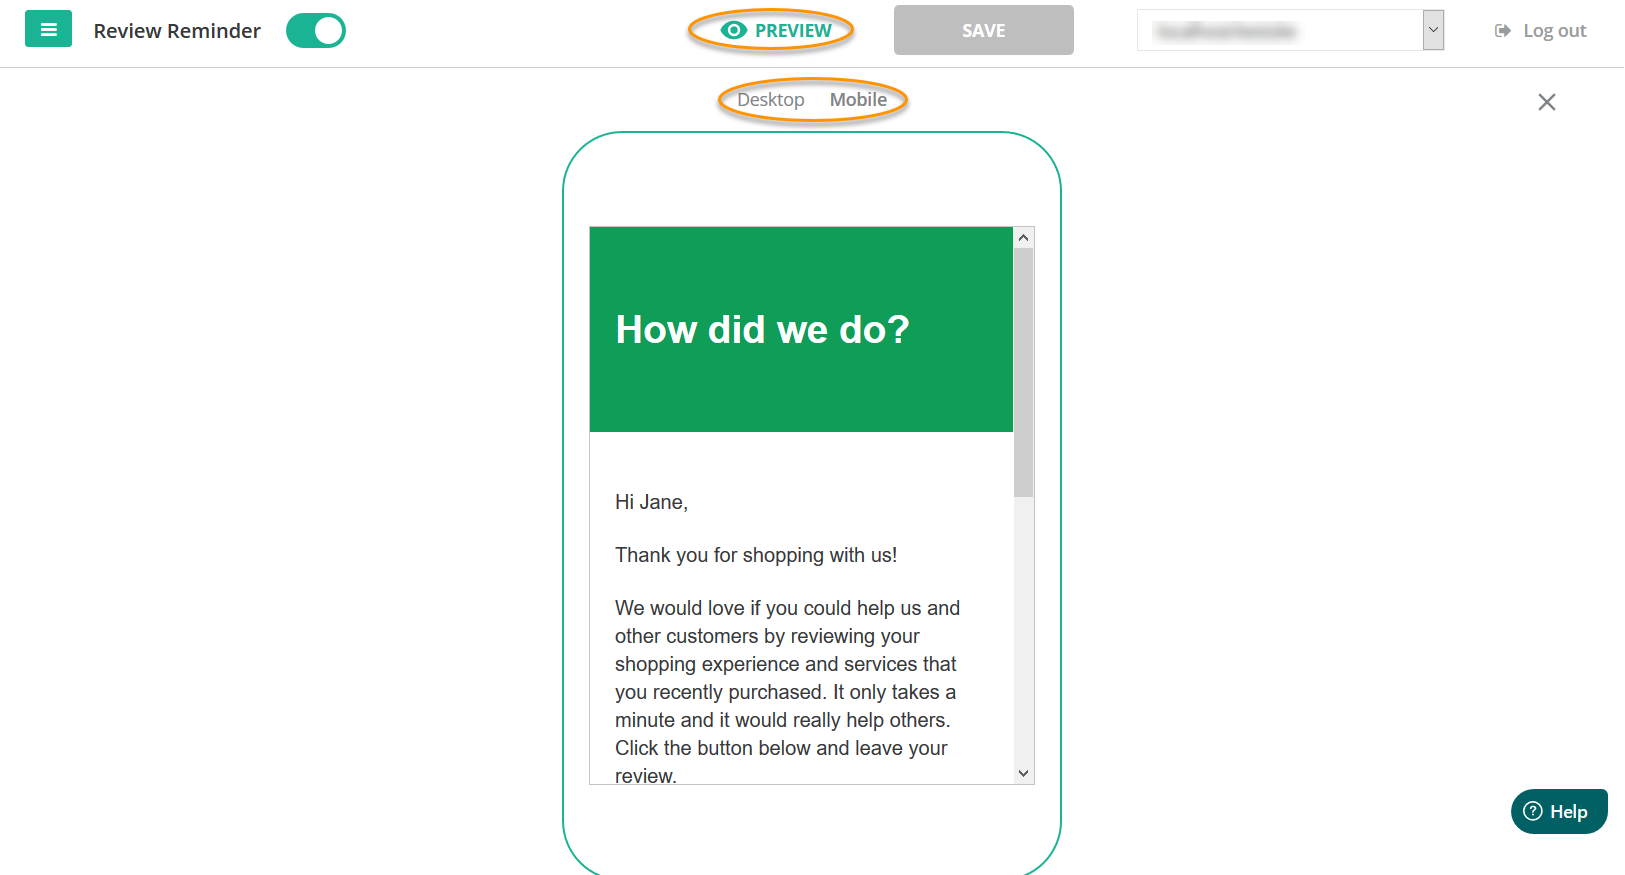
Using the above two colors and the email content in the previous examples, here’s what a sample Basic Email would look like to a customer.
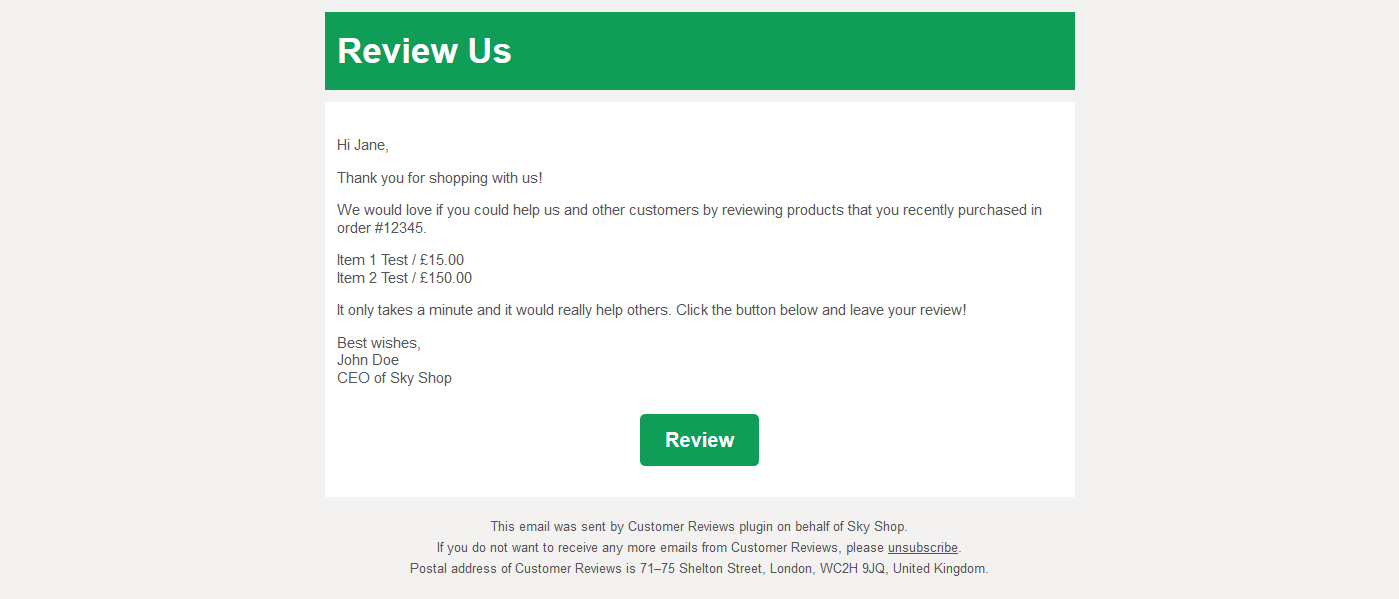
You will note here that dummy data (like Jane Doe as name and Item 1 Test as one of the product names) is used for the test as a real email would require real data from a real order in your WooCommerce store. The purpose of this test is to make sure that the layout of the email is what you need and that you have correctly made use of variables.
Advanced Email Templates
Advanced email templates are available only to customers with a professional license and offer many more options than their free counterparts. Using this option will grant you the freedom to customize every part of your email so that it matches your brand perfectly and stands out from your competitors. Our Pro users can an Advanced Email Editor to customize the templates using a visual interface so that they know exactly what their emails will look like when sent to customers.
Get a Pro License
To get started with Advanced Email Templates, first, create an account on our plugin’s website. Next, click on Pro License Key and follow the simple steps to obtain a key that will upgrade the plugin to the professional version.

As soon as you have a Pro License Key, copy it to your clipboard, go to your WordPress dashboard, on the Reviews > Settings page, navigate to the License Key tab. Paste your license key and save your changes. You should see Active: Professional Version as the License Status.

Advanced Visual Editor

Note that with this option active, it will override all the changes that you’ve made in your WordPress dashboard (described in the Basic Templates section above).
Now, click on the email sample layout to use the Advanced visual editor, as shown above.
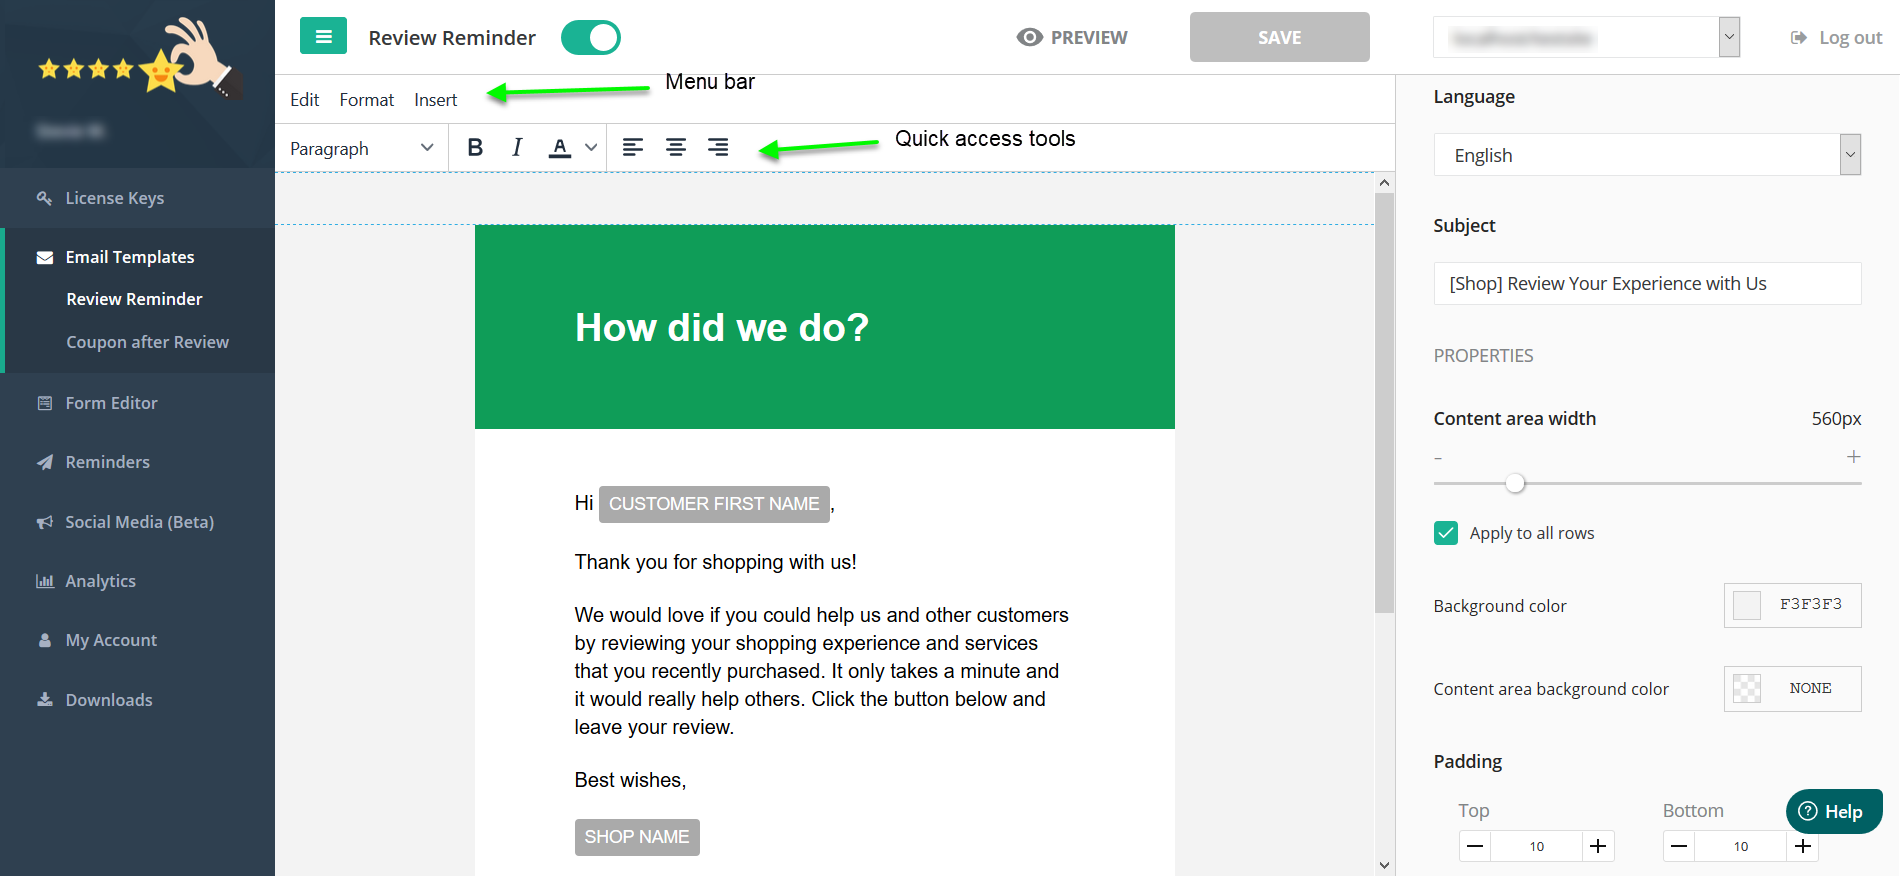
The Edit menu provides basic operations like Undo, Cut, Copy, and paste while the Format menu offers tools that let you can manipulate text and paragraph the way you want them, similar to a word processor or a page builder. To manipulate text, first, select it with your cursor, then go to Format and click the appropriate option. You can also use the toolbar below the menu bar for quick access to common formatting options.

Using the Insert menu, you can add images, dividers, a Review Button, as well as an Unsubscribe button. You will also find the option to use Variables in this menu. Variables are placeholders that will be substituted with the values that they represent when the email is sent. For instance, if your customer’s name is Jane Doe, putting "Hi {customer_first_name}," in the email body will appear as "Hi Jane,"when the email is sent.
site_title: The title of your WordPress website.
customer_first_name: The first name of the customer who purchased from your store.
customer_name: The full name of the customer who purchased from your store.
order_id: The order number for the purchase.
order_date: The date that the order was made.
list_products: A name and price list of the products purchased.
Note that you need to enclose the variables between curly brackets (e.g. {site_title}) to use them.
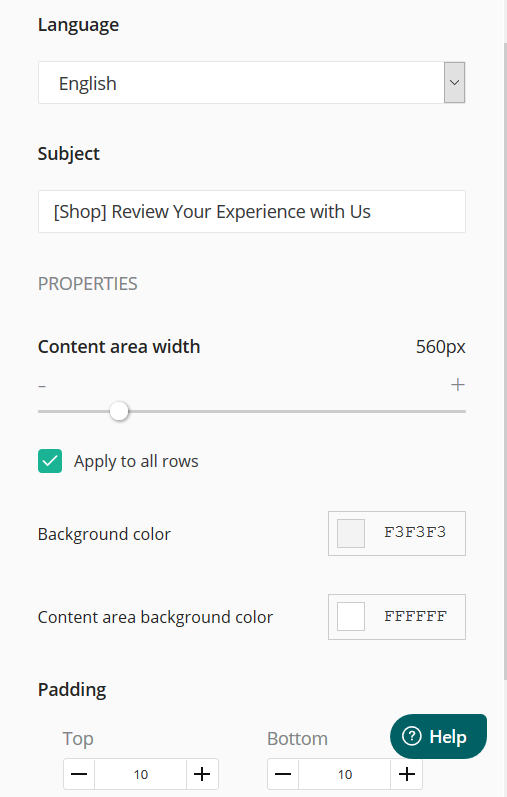
The right panel lets you adjust settings like the width of the content area and padding. It’s also where you can change the subject and language used in your email. It’s also possible to quickly change the colors of the different sections of the email using the right panel.
Previewing your changes
If you want to be absolutely sure that the email will look like you want it to in an email client or email service, you can send a test email to an email account that you control. To do so, go to your WordPress dashboard and choose Reviews, Settings, ensure that the Review Reminder tab is selected, scroll to the bottom of the page and you’ll see the Send Test option. Simply type your email address and hit Send Test. A simulated email will be sent to you using dummy data (like Jane Doe as name and Item 1 Test as the product name).

Final Words
We hope that you are now well-equipped to start designing professional, crisp looking emails on your own using both Basic and Advanced email templates. If you are experiencing difficulties using our plugin or our website, you are encouraged to post your queries on our support forum or if you have a professional license, please open a ticket and our support team will promptly assist you to resolve any issues.
Did you find it helpful?
Yes
No
Send feedback Sorry we couldn't be helpful. Help us improve this article with your feedback.